How to Create An Email Account In cPanel with cPanel Web Hosting
cPanel Web Hosting comes with the industry leading control panel called cPanel.
It helps you control your hosting account with many tools including uploading your website, creating and managing your email accounts, and helping you install applications on the web server.
With cPanel, you can also perform the simply but important task of creating an email account.
Here is a guide to creating an email account in cPanel, in just 4 steps.
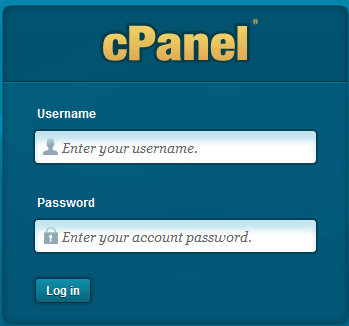
1. Log in to your cPanel using your given username and password.
– To login, go to your domain name link as follows: www.yourdomain.com.au/cpanel
2. Click on the icon ‘Email Accounts’ under the Mail section.
3. Fill in the details you want for the new email account including the email, and password, and the email quota limit for your account. The quota limit lets you define the amount of email that can be store in the mailbox. If the limit is surpassed, all incoming mails are sent back to the sender.
4. Click on ‘Create Account’.
Bingo! You just created your first email account on cPanel
Your new email account will appear in the table below. Here you are able to edit all their details such as quote and password.
Swish Connect is a leading provider of Web Hosting Australia plans with a range of services including Domain Names, Web Hosting plans, Business Web Hosting, Reseller Web Hosting, VPS Plans and Dedicated Servers.